In a previous blog post, Using Autocomplete Templates in Sigasi 2, I introduced autocomplete templates in Sigasi 2 and demonstrated how to use the pre-defined templates. In this post I’ll explain how to customize these templates and how to create your own. Chances are high that the pre-defined templates slightly differ from your preferred style or that you have your own standard pieces of code that you use on a regular basis.
Edit existing templates
To demonstrate the power of custom templates I will tailor the
process-template of the example in my previous post to a
different style. In my previous post, I demonstrated how to
replace “rst” by “reset” and “clk” by “clock” in the template editing
session. If all reset signals in my design are called “reset” instead of
“rst” (and “clock” instead of “clk”), it would be better to modify the
template, so that the names are correct by default.
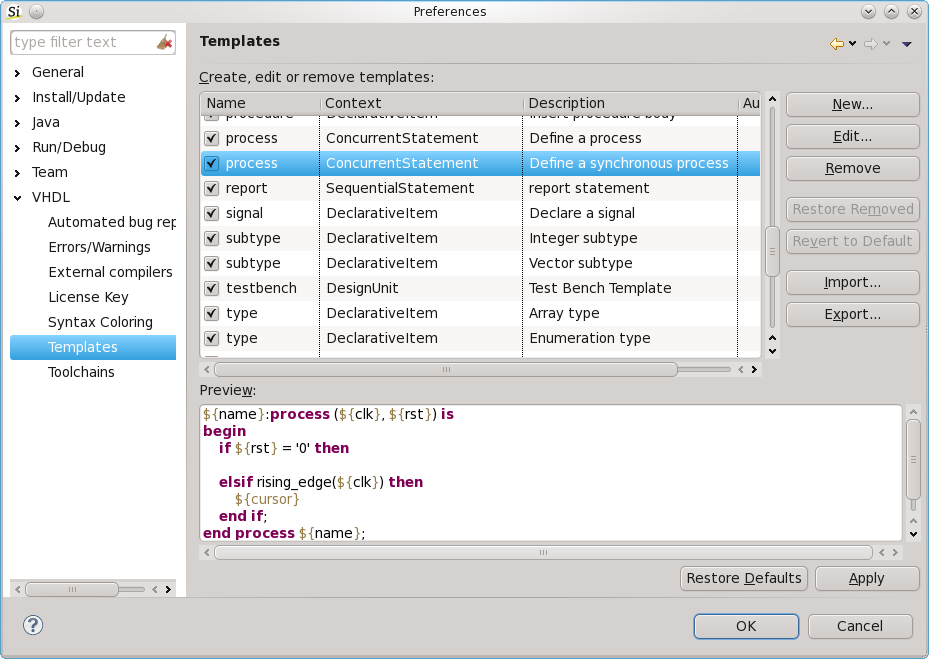
The first step is to open the Templates Preference page: Window > Preferences > VHDL > Templates and select the process template.

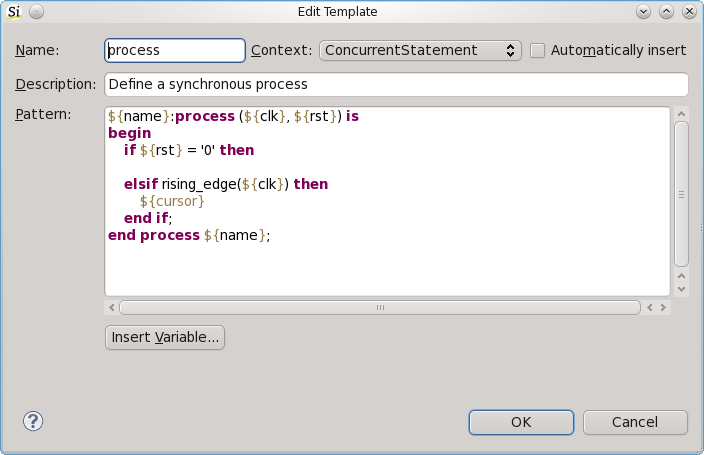
Click Edit… and you will see the template’s code.

The syntax is really simple. The template contains text and
variables. The text is inserted as is when the template is
expanded. Variables, enclosed in curly braces ${ },
become fields that can still be modified by the user once the template
is expanded. The name of the variable will be used as the default value.
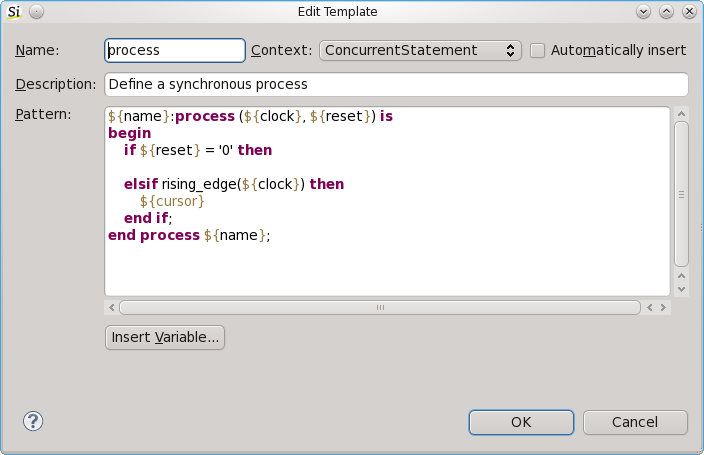
In this example we want to replace the default of rst with reset and
clk with clock. You can achieve this by changing the variable names
in the template. Notice that you have to replace all occurrences,
otherwise Sigasi will regard them as different variables.

Press OK (twice) to confirm the changes.
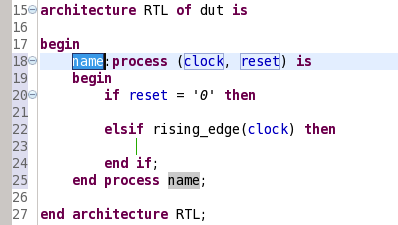
If you now autocomplete the process template, you will see that the
default names for the clock and reset signals have changed.

Feel free to experiment with more customizations to the templates like adding default comments or changing white space and indentation.
Create new templates
Creating new templates is the evident next step. In the Templates Preference Page (Window > Preferences > VHDL > Templates), simply press New….
First you have to specify a Name for your new template. Choose it carefully because this name will be what you have to start typing when you want to expand the template.
Next you have to specify the Context where this template can be
expanded. For example the process statement can only occur at places
where concurrent statements are allowed. Other options are Anywhere
(Sometimes you want your template to appear anywhere, e.g. for comment),
expressions, declative item, etc.
Tip: If you select DesignFile as context, your template will also
appear as template option in the New VHDL File Wizard.
The Description is what you will see next to the template name if there are multiple possible templates that can be expanded.
Next you can insert the actual template. Note that apart from
user-defined variables (like ${name},
${clk} and ${rst} in the above example), you
can also use pre-defined template variables. Pre-defined template
variables are variables that are filled in by Sigasi itself when the
template is expanded. Examples are ${user} and
${date}. If I would autocomplete a template that contains
the ${user} variable it would become “heeckhau” in the expanded
template. Note that you can use Ctrl+Space to autocomplete these
pre-defined variables when you are editing the template.
Useful examples of custom templates are file headers, default library
and use clauses, (others=>'0'), …
Conclusion
Custom templates can really help you improve your coding speed by assisting you in typing faster, especially for verbose VHDL constructs. Templates are really flexible and can be customized to really suit your needs.
See also
- Using Autocomplete Templates in Sigasi 2 (blog post)
- Exploring GitHub Copilot (blog post)
- Import a project in Sigasi Studio from `.f` files (blog post)
- Importing a Quartus project in Sigasi Studio (blog post)
- Autocomplete templates (screencast)