Adding external libraries to your project requires creating linked resources, managing path variables, and correctly configuring library mappings and include paths. This manual process can be complex and time-consuming.
It is also inefficient, because the necessary configuration information is
often already available at the source. For example, when adding Vivado’s
unisim libraries, the destination unisim library is already known.
Sigasi simplifies configuring a number of well-known libraries. The following scenarios have dedicated support for an easy setup:
- Libraries shipped with common tools such as Quartus and Vivado
- Verification libraries such as UVVM and UVM
- Your own Custom Library
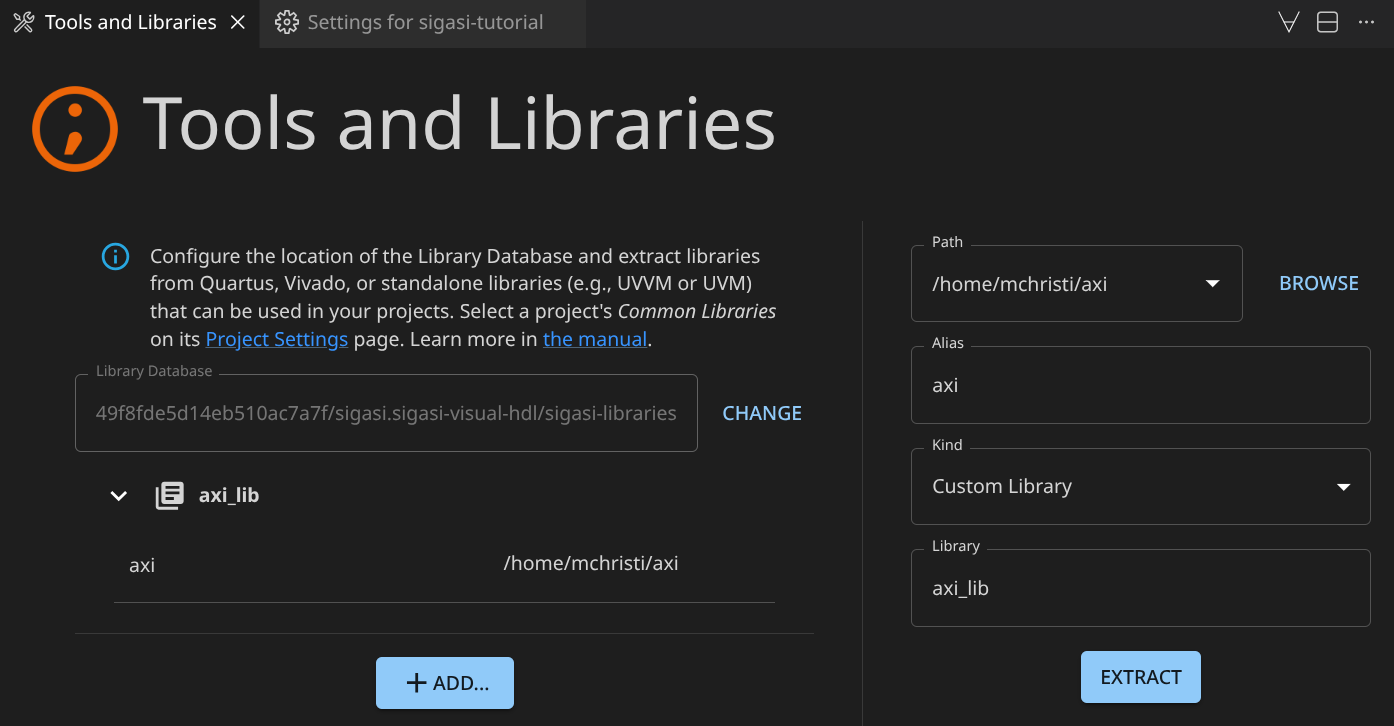
The tools and libraries database
The Tools and Library Database stores HDL content that can be reused to populate your own projects. This HDL content is obtained by extracting it from other external sources like the aforementioned tools, verification libraries, and custom libraries. The extracted HDL content is copied (the original is left untouched) into a location dedicated to the Tools and Libraries Database.
All the HDL content stored in the Tools and Libraries Database can be introduced with a few clicks into your own Sigasi Project.
Populating the database
First, you need to add HDL content to the Tools and Libraries
Database. To do so, let’s open the Tools and Libraries settings page
using the Sigasi: Open Tools and Libraries Settings command from the command
palette (
). The first time you open this database, it
will be empty.

At the moment, the only information here is the path where the database will be stored. If you plan to extract large amounts of HDL files into the database, you may want to point this path to a location with enough disk space.
Our next step is to populate the database. We go through 5 examples:
- Extracting HDL files from a Vivado installation
- Extracting HDL files from a Quartus installation
- Importing a UVM library
- Importing a UVVM library
- Importing a custom library
When adding a new tool, you can find a list of detected toolpaths in the
drop-down menu. Use BROWSE if your tool isn’t there.
Vivado
If you have a Vivado installation from which you want to use HDL content, click
the Add button and complete this dialog.
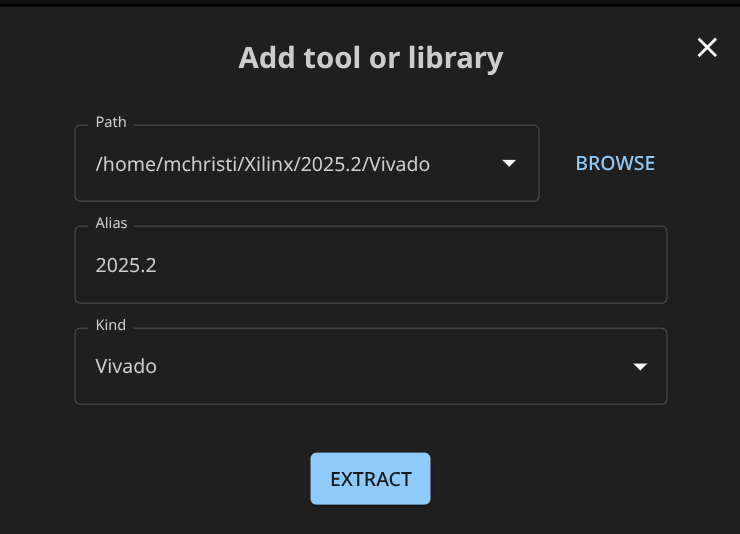
You need to provide the following information:
- Path: This is the path of your Vivado installation
- Alias: This is the name under which this particular Vivado installation will be known to your VS Code environment. Note that you could have multiple Vivado installations (different versions) on your system. You can register each of them to your Tools and Libraries Database under a different name and use HDL files from any of them in your project.
- Kind: Select
Vivadoto confirm to Sigasi that we are indeed dealing with an installation of Vivado.
Now, click EXTRACT. Sigasi will start analyzing your Vivado
installation and extract useful HDL content. Have a cup of coffee: this may
take 1-2 minutes. In the gutter of VS Code, you can see the message
Extracting libraries .... If you click on it, a pop-up notification appears,
where you can see extraction progress. Pressing the Cancel button will abort
the extraction process.
Once the extraction is concluded, you see:
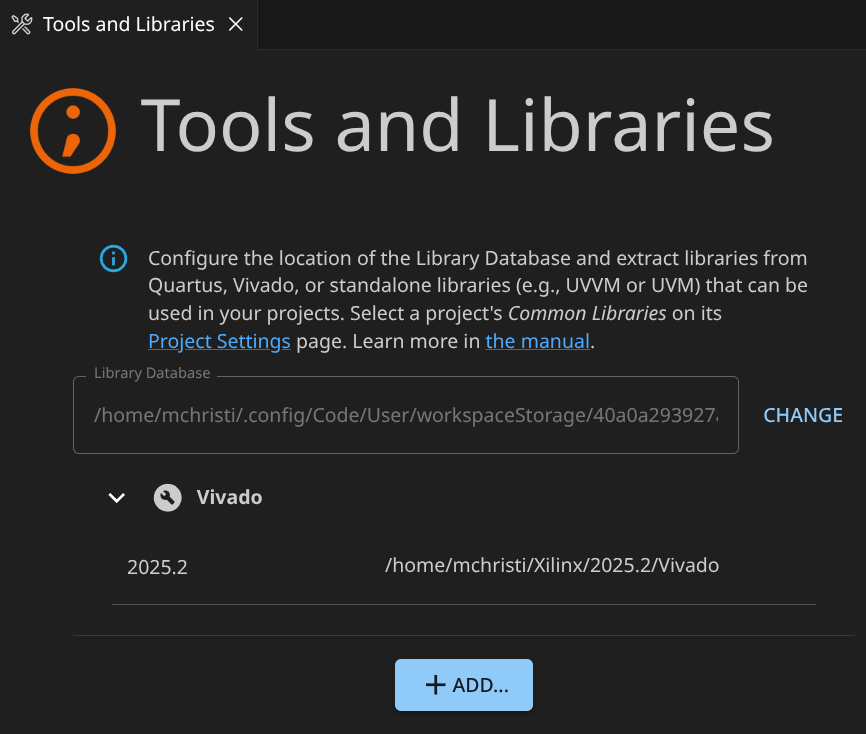
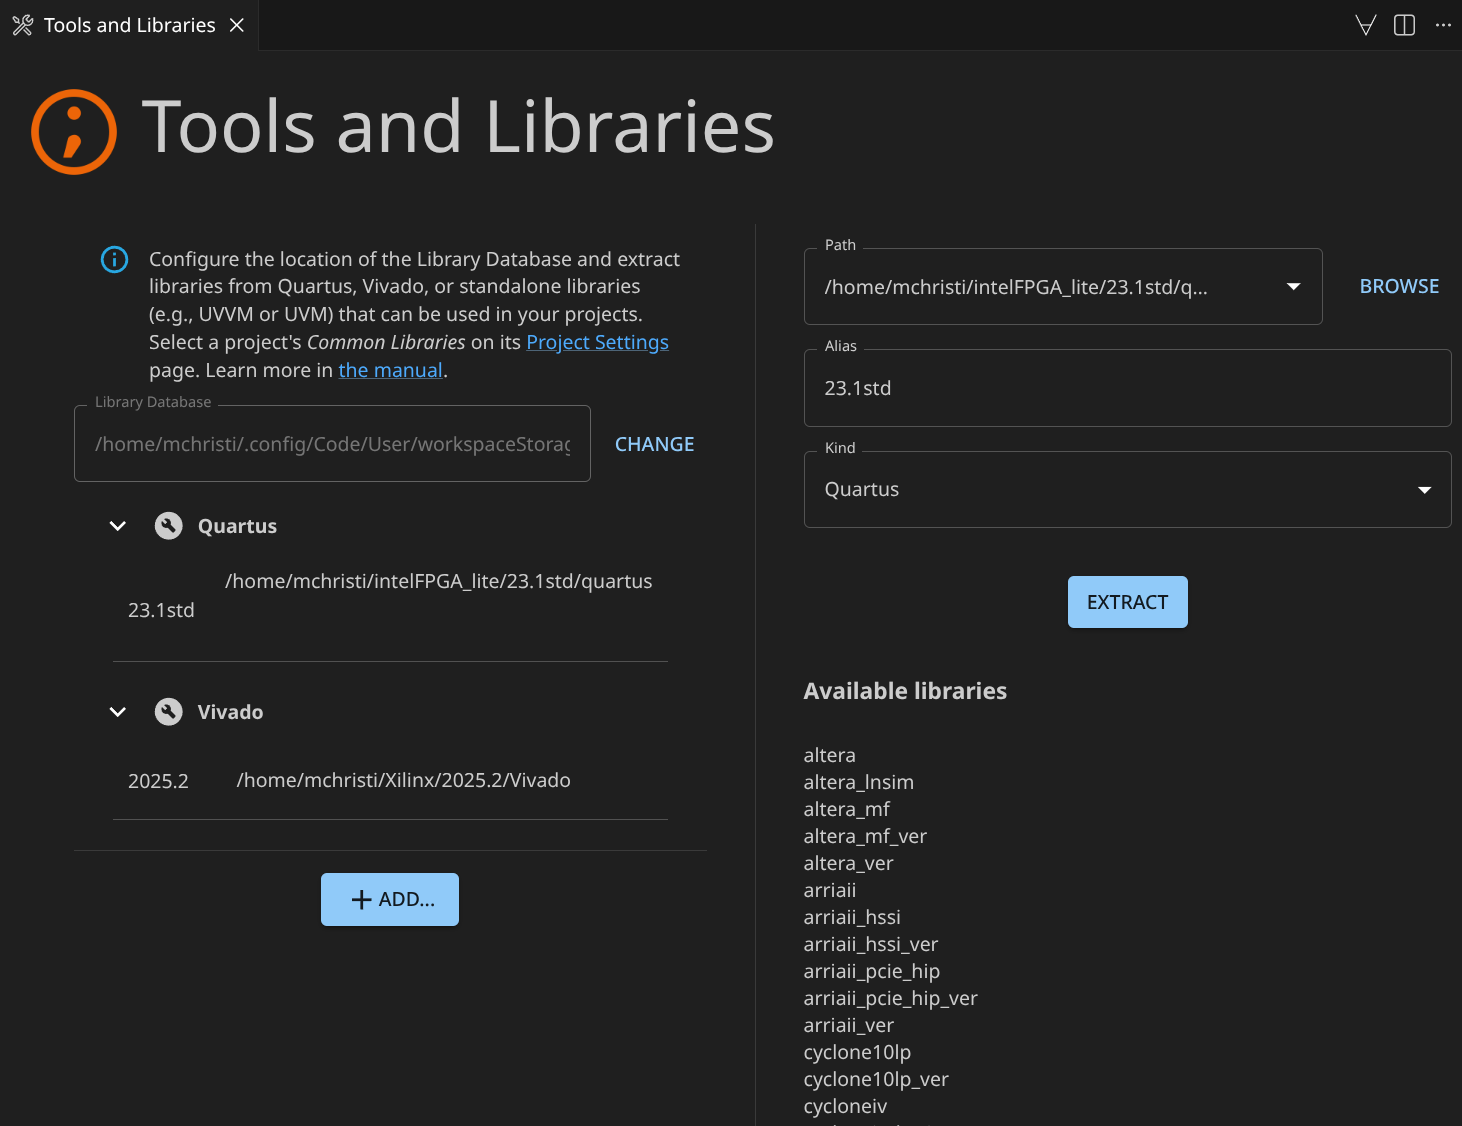
Click on the Vivado entry that was added. You see the details of all the HDL
content that was extracted from the Vivado installation under the Available libraries section:
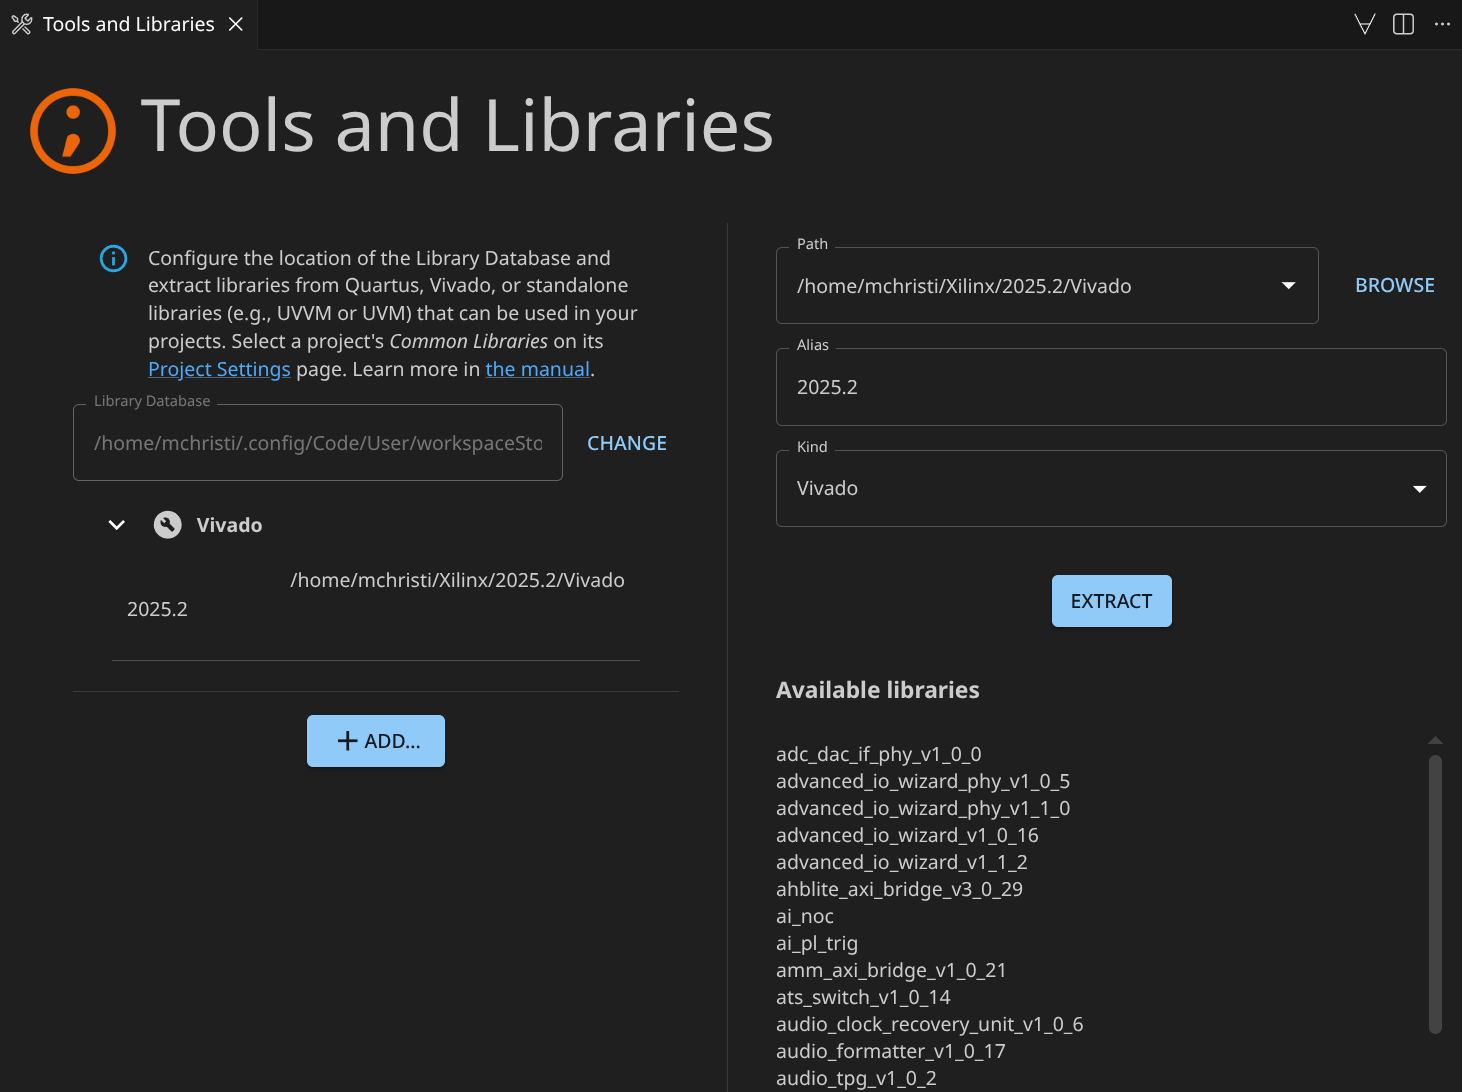
If you scroll through the list, you’ll find familiar content, for example, the
unisim library.
Quartus
For Quartus, the same procedure can be followed as for Vivado. Add your Quartus installation to the library database.
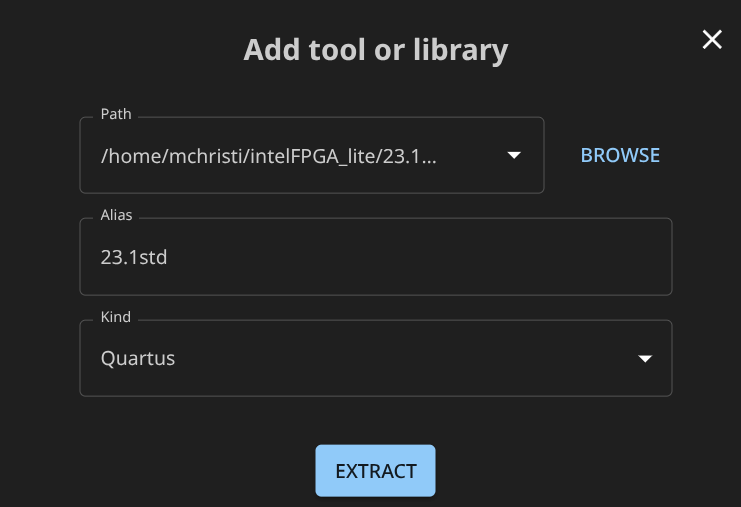
Start extraction and this Quartus-related HDL content will become available
under the Available libraries section:
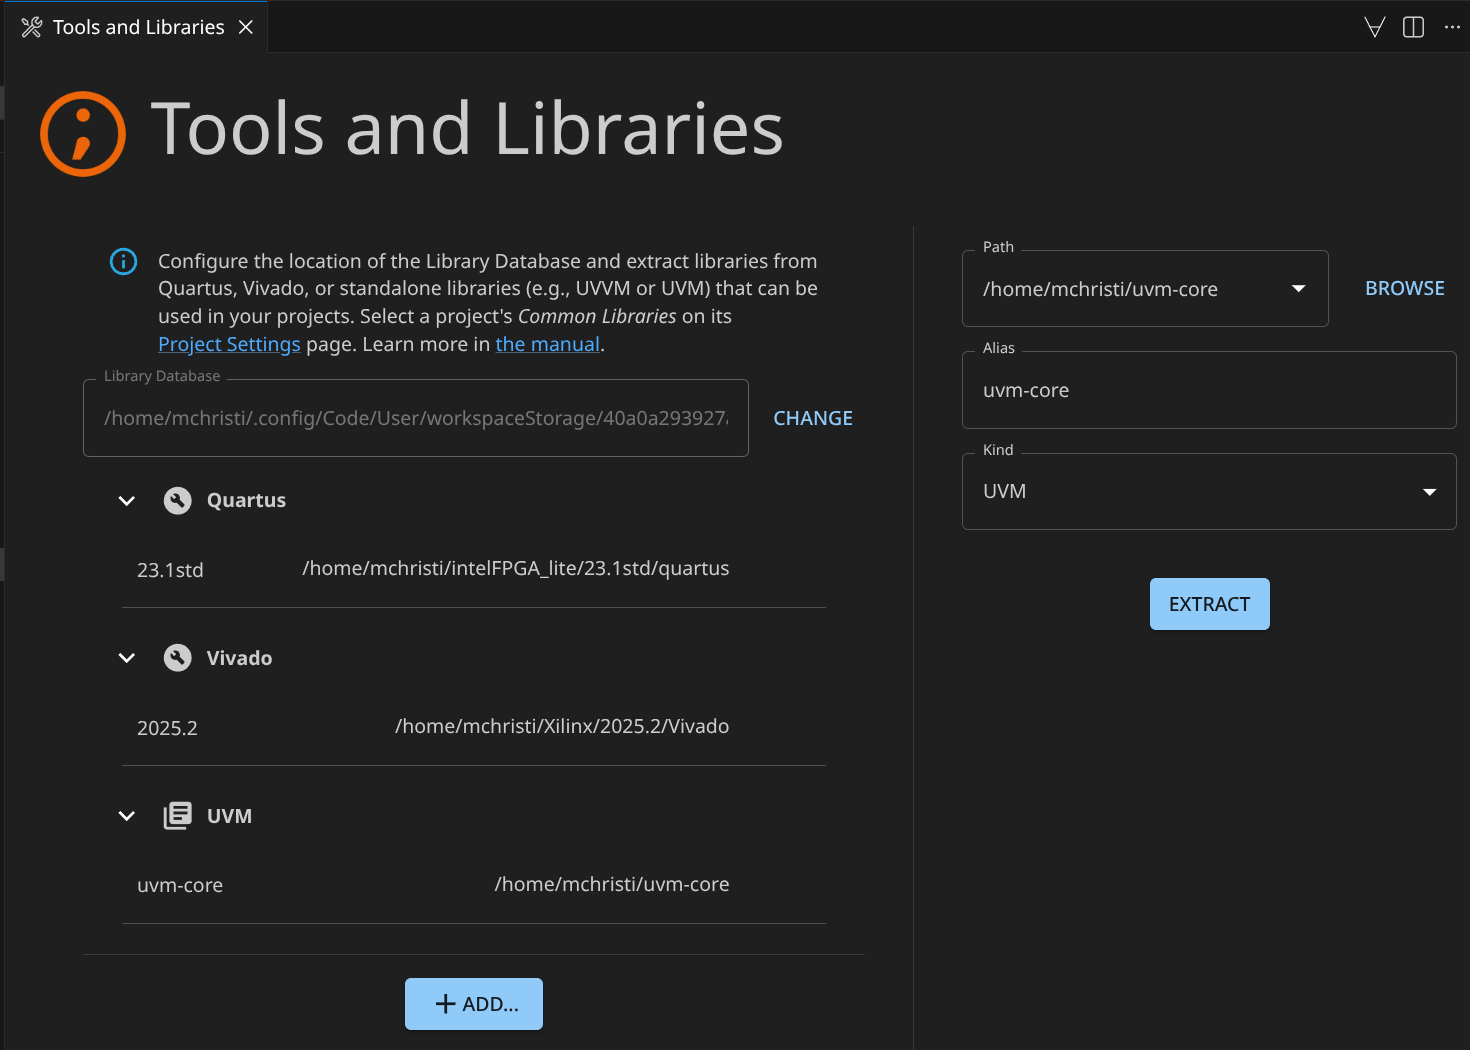
UVM
So far, we’ve extracted HDL content from two tools, Vivado and Quartus. Sigasi also has dedicated support for adding UVM libraries to your library database.
Suppose that you have a local copy of UVM. You will probably want to use that copy time and time again when you build UVM testbenches. Let’s register that copy with the library database.
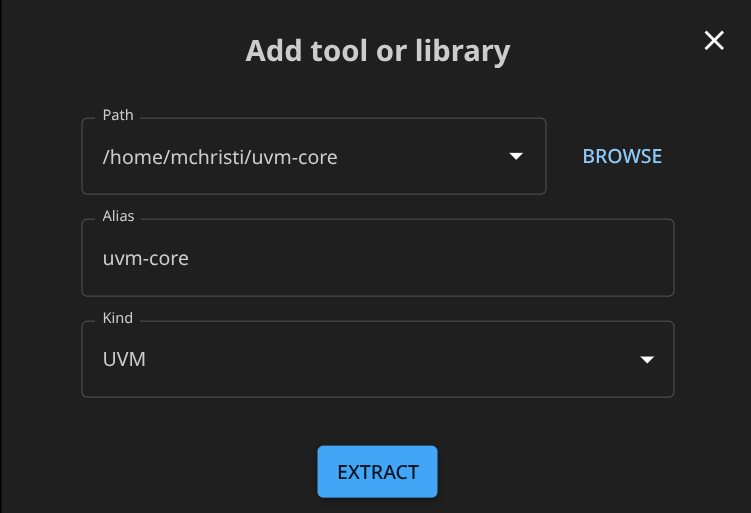
Start extraction and the UVM-library becomes available.
UVVM
And similarly, Sigasi has support for adding UVVM libraries:
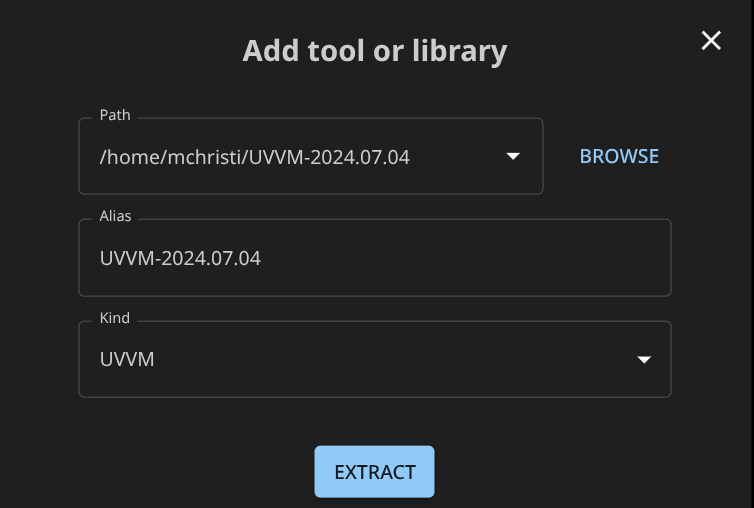
Start extraction and the UVVM-library becomes available.

Custom libraries
A final type of HDL content you can make available are Custom Libraries.
Custom Libraries are typically HDL source trees that can be reused from one
project to the next and whose HDL content all belong in the same HDL library.
Take for example the PULP Platform AXI
library . This repository provides
modules to build on-chip communication networks adhering to the AXI4 or
AXI4-Lite standards. You probably want to reuse this code in multiple
projects. There is no specific support for this particular library in Sigasi, but still, you can register this code in your library database as
a generic, Custom Library. This will make this HDL code available for easy
reuse and will, upon import in a project, automatically configure the code to
reside in the correct HDL library, called axi_lib.
This configuration of the HDL library is the main difference between importing a Custom Library and a library with built-in support like UVM or UVVM. For the latter, Sigasi automatically knows the correct HDL library. For a Custom Library, you have to provide the target HDL library yourself.
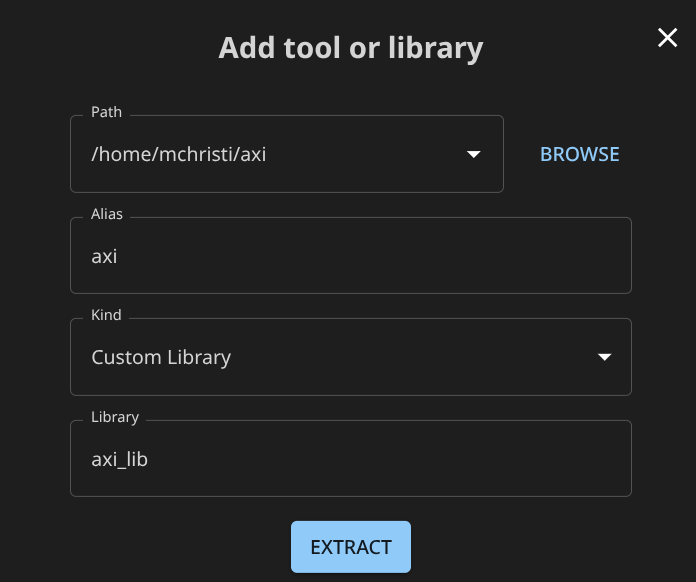
Once you’ve properly configured your custom library, push EXTRACT and the
custom library becomes available:
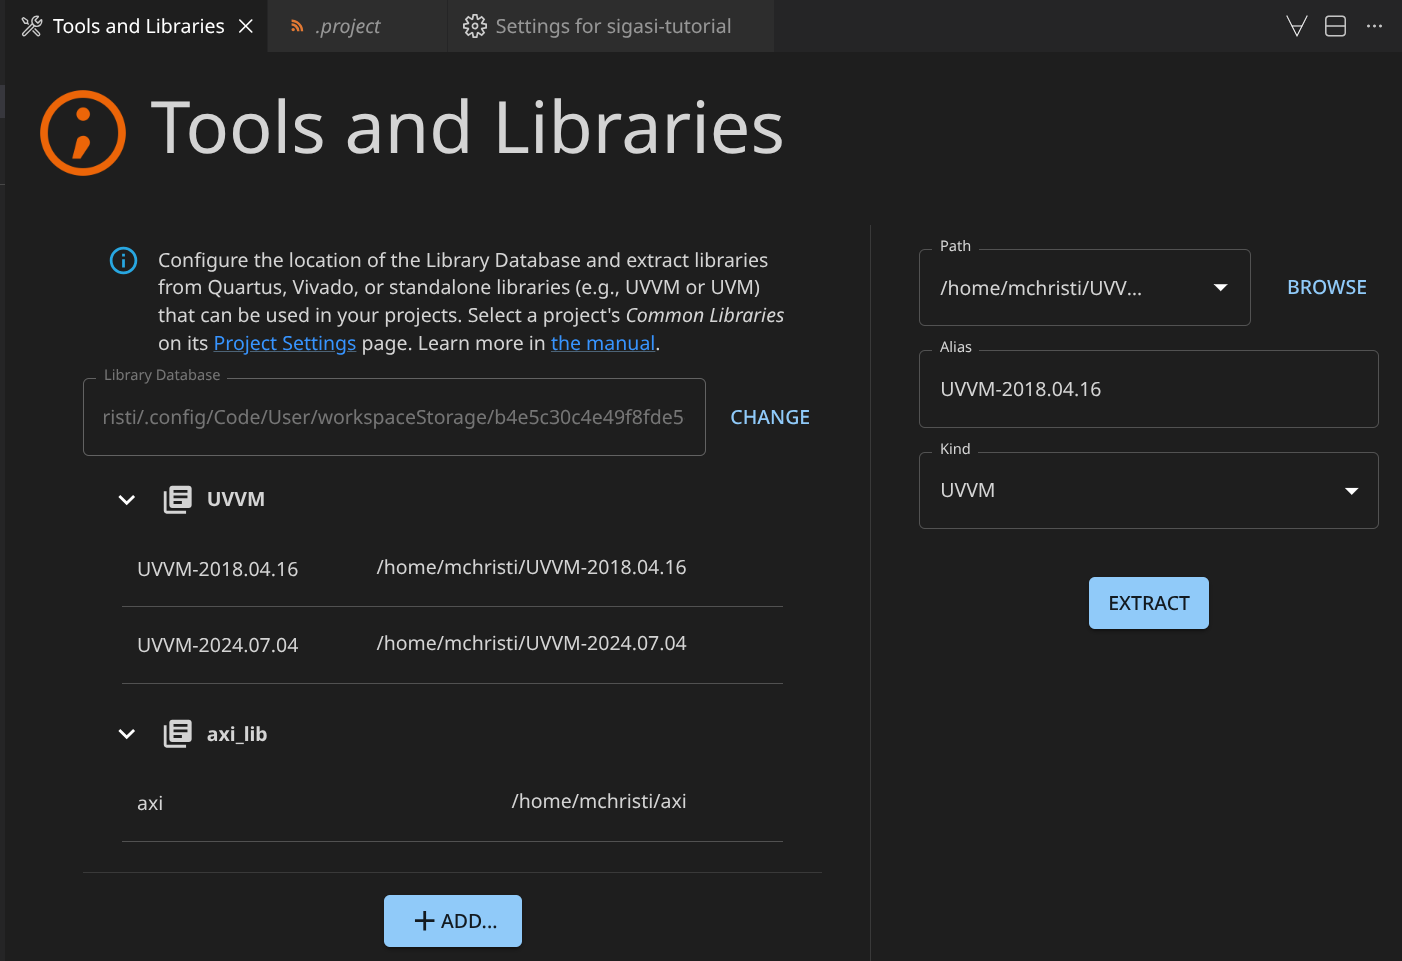
Adding multiple versions of tools and libraries
In the previous section, we illustrated how you can import tools and libraries in the Tools and Libraries Database. But what if you have multiple versions of, let’s say, UVVM that you want to use throughout your projects. That too is supported. Suppose you’ve already imported UVVM 2024:
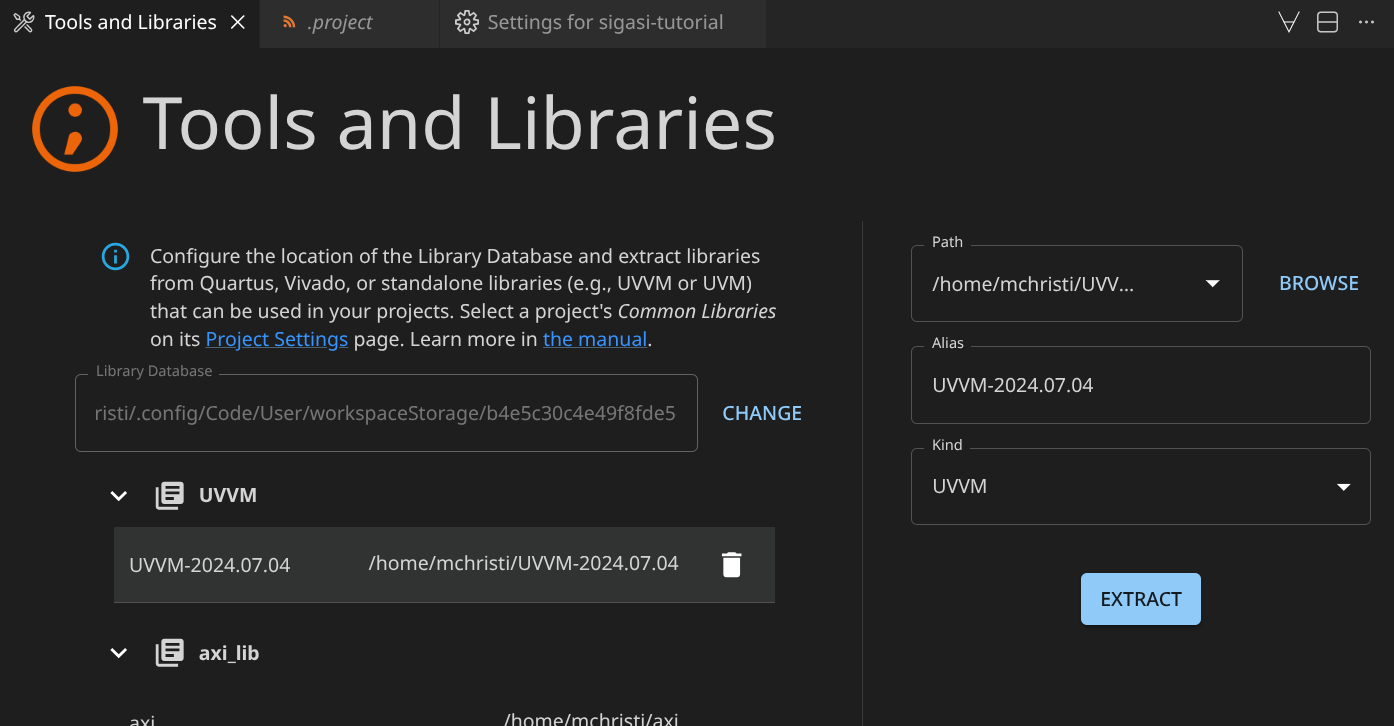
But, you also want to have UVVM 2018 available in your Tools and Libraries Database. Just add the second UVVM library as before:
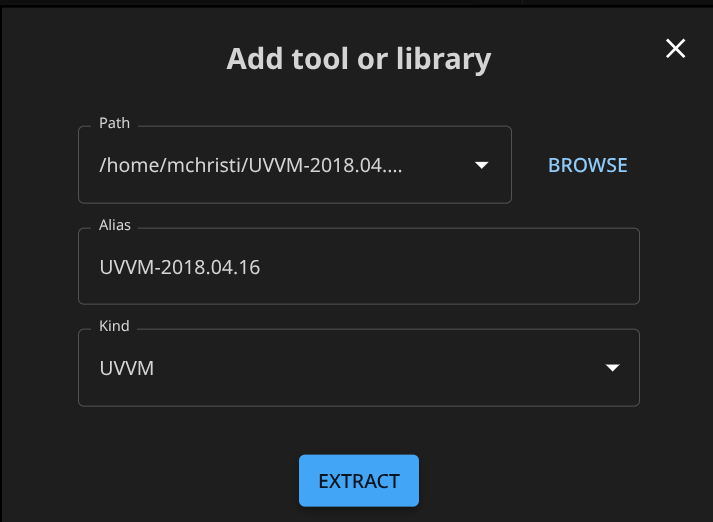
The net result is that there are two UVVM libraries available for you to add to
your projects. It’s good practice to use a tool or library version as alias;
however any identifying string can be used, e.g., latest, stable, etc.
Using the imported HDL in your project
You’ve imported a number of tools and libraries into your database. To start using them in your own projects, right-click the project-node in the Sigasi Projects View and click . Go to the Common Libraries tab and select what libraries you want to use in your project.
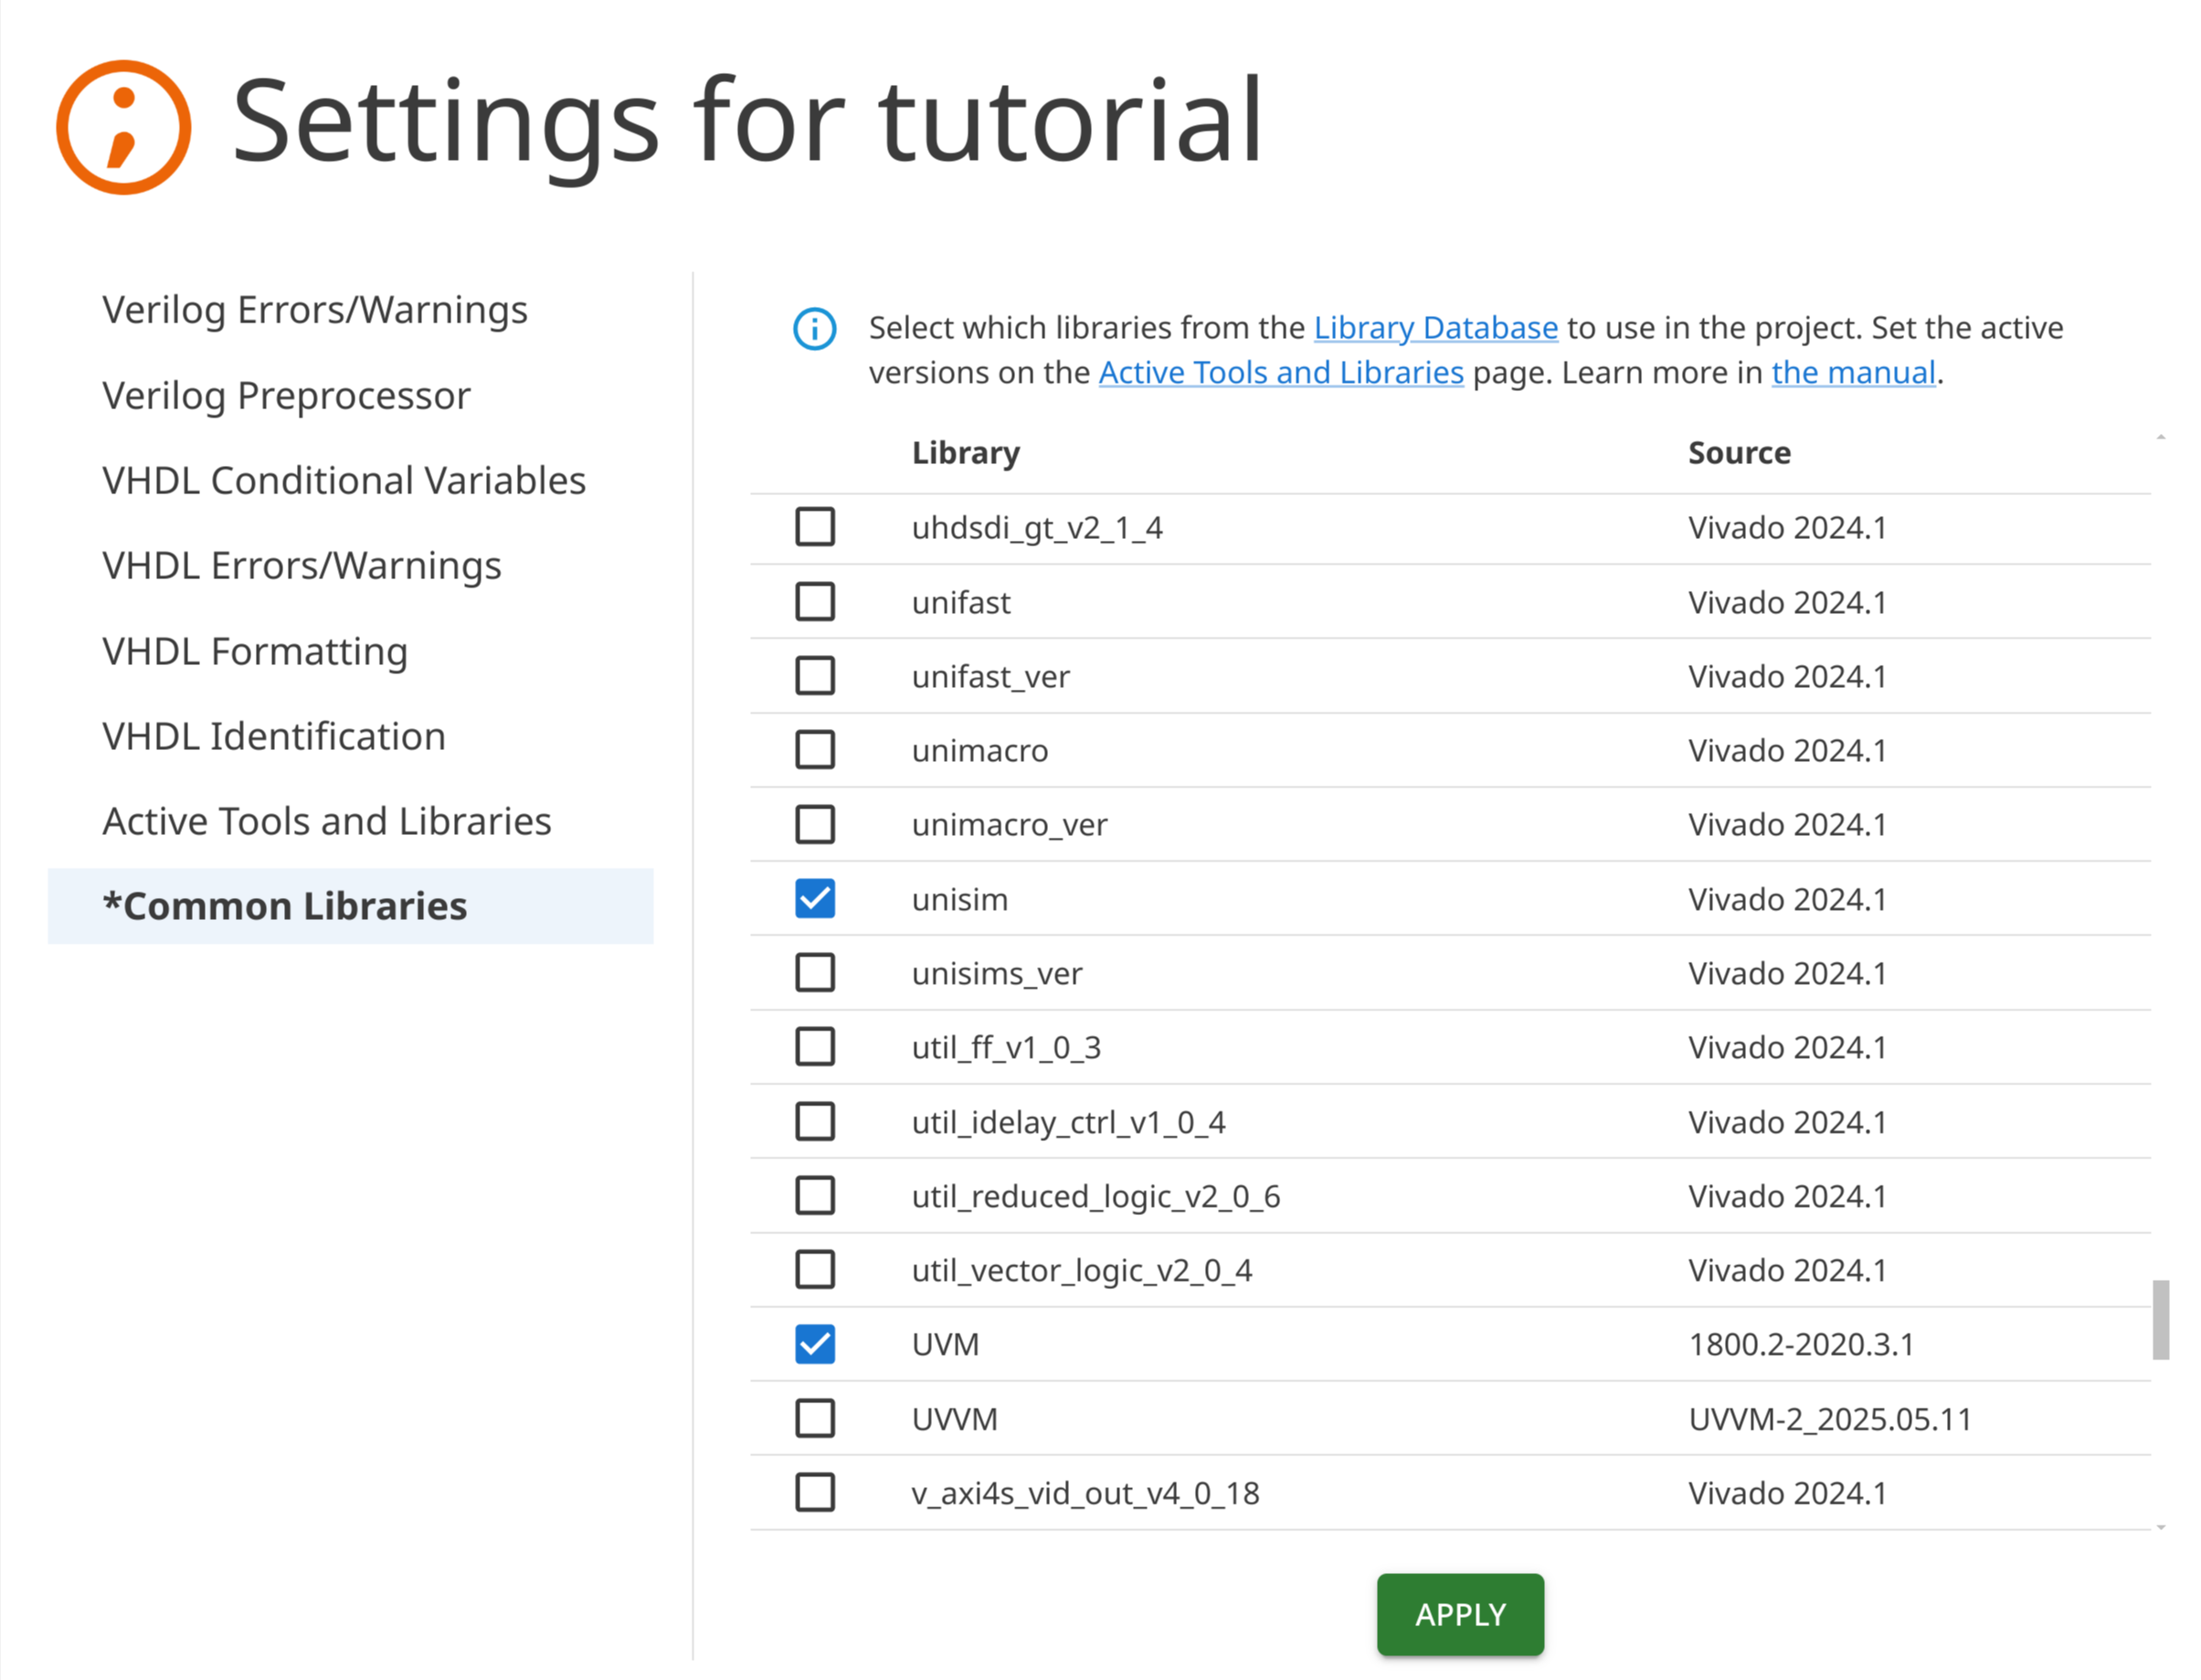
After pressing the APPLY button, selected libraries will be linked to your
project in the Common Libraries folder (while deselected libraries will be
removed). In the Source column, you can see which library or tool version is
used. It shows the alias we configured in the previous section.
If, later on, you notice you don’t need the libraries anymore, you can deselect them here as well.
What happened behind the scenes? Sigasi added a Linked
Resource using a Path Variable to your .project file. The path variable points to
the actual location of the HDL source that you’ve added to your project.
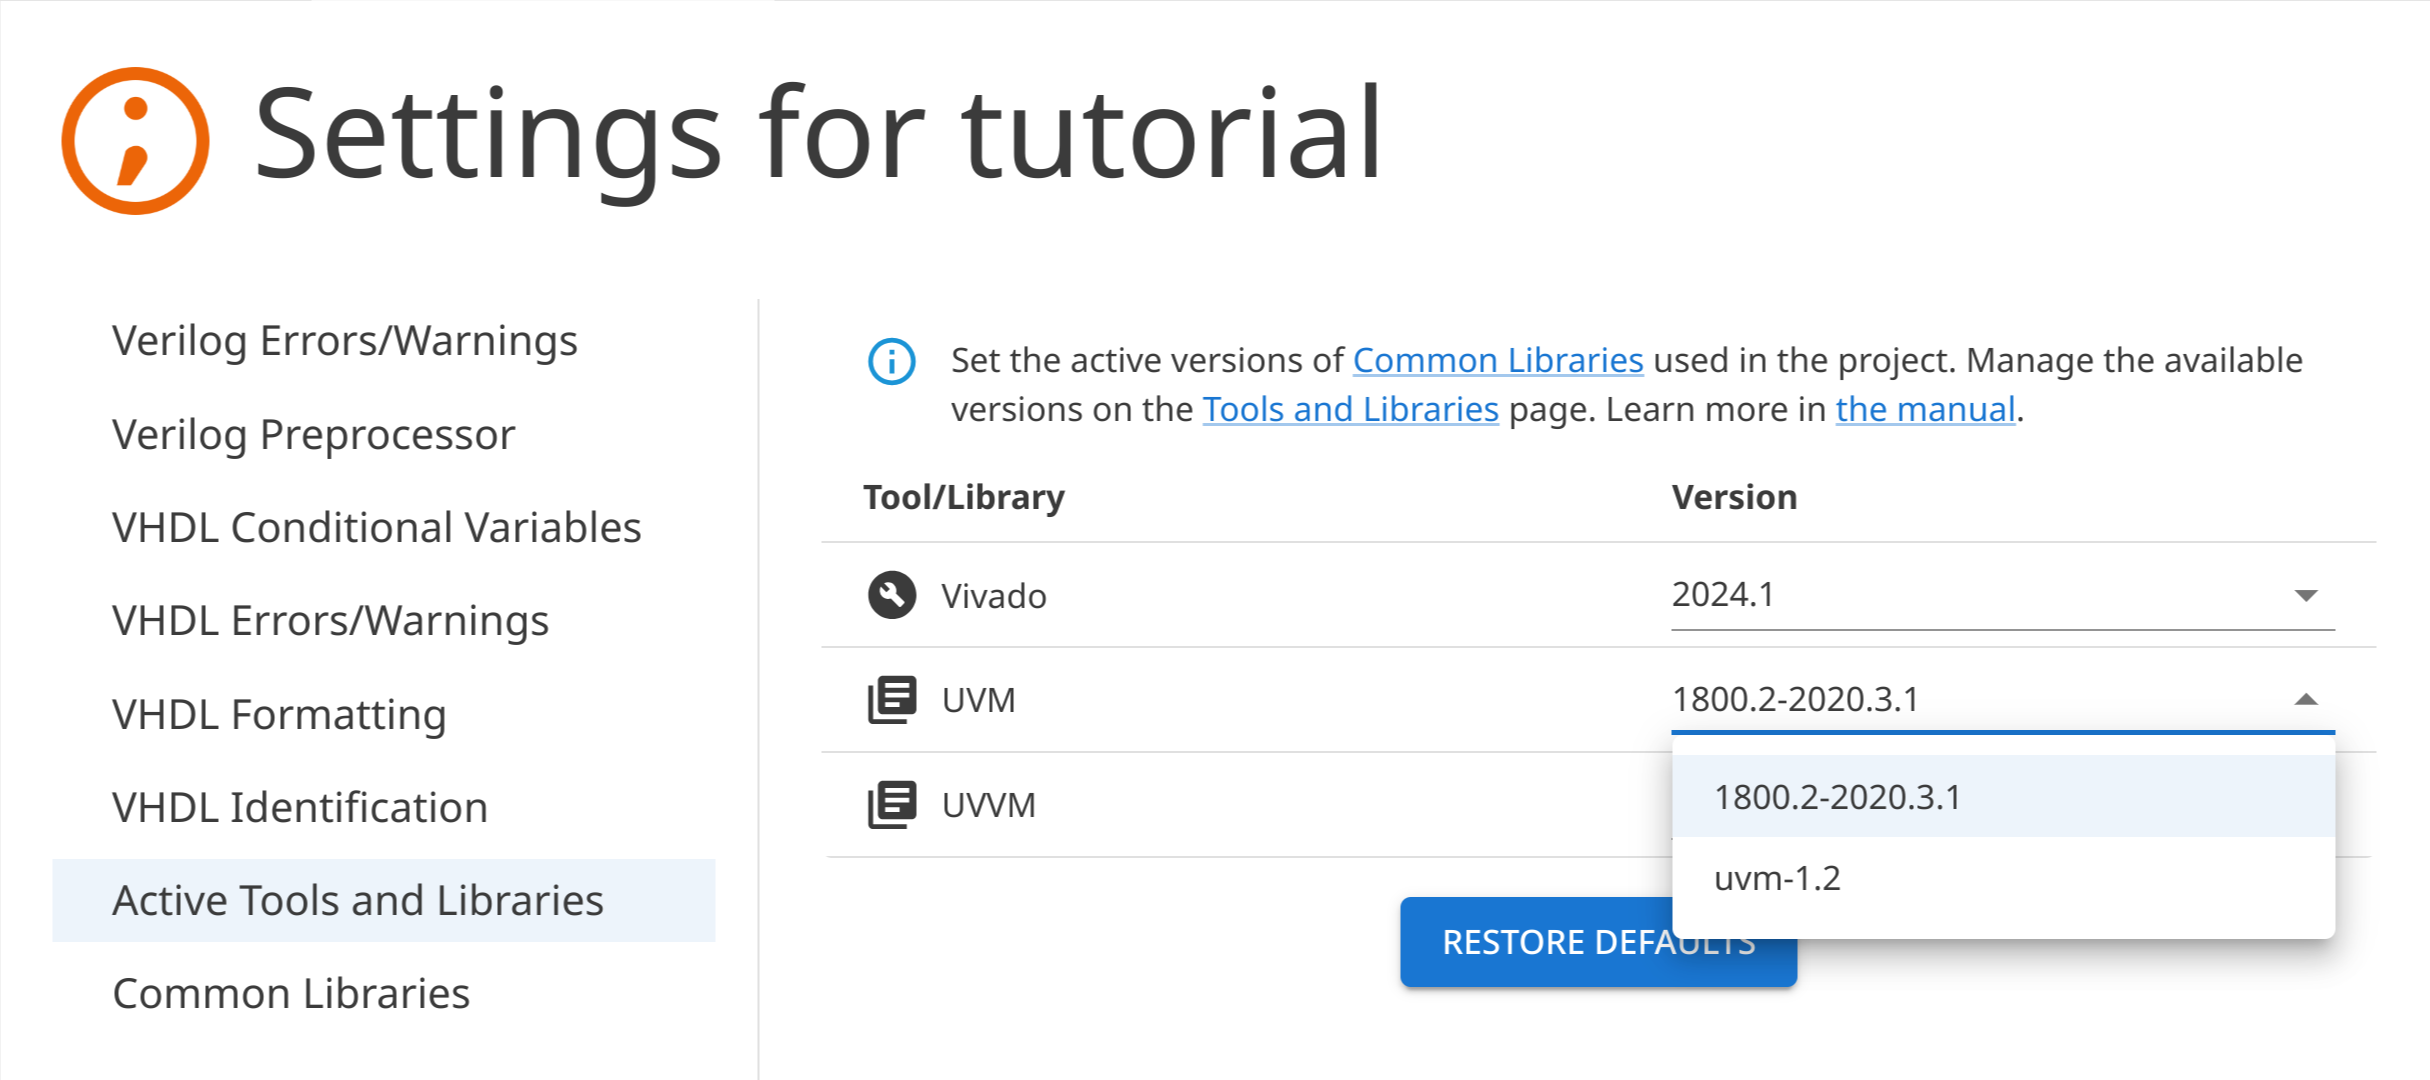
On the Active Tools and Libraries project settings page, you can see which versions of libraries and tools are currently being used by your project. If there are multiple versions of tools or libraries available in the Tools and Library Database, you can change the version that should be used by a project.
Odds and ends
- The Sigasi extension should be running in order to open the Tools and Libraries settings page. You can open or create a project to start the extension.
- If the project configuration for a library is out-of-sync with an intended
library layout (e.g., library files mapping was manually changed), this
library will be marked as
(out-of-sync)and theSYNCHRONIZEbutton will appear. Pressing this button will fix the configuration of all libraries that are out-of-sync. - The extracted HDL content is stored as a copy in your Tools and Libraries
Database. As a consequence, when you update the original source of the HDL
content, this update is not immediately reflected in your database. To update
the content of your database, go to relevant content in the Tools and
Libraries View and press the
EXTRACTbutton. A new extraction of HDL content will be performed, bringing your database up to date. - By default, the Tools and Libraries Database will be located inside a
workspace storage directory from VS Code. This is typically
.config/Code/User/workspaceStorageon Linux or%APPDATA%\Code\User\workspaceStorageon Windows. You can choose a different location. When selecting a new, empty directory, you’ll be given the option to copy an existing database to this new location. Once copied, the new location is an independent copy: you are free to add more HDL content to it. - The Tools and Libraries Database is self-sufficient, so it’s possible to distribute it between Sigasi users to ensure everyone uses the same library versions. You can also share it between multiple Sigasi projects.
Note: A Tools and Libraries Database can also be created through CLI.